🎁 Sign up today to receive a $50 product sample credit – limit one per company. Create your account!

How to Create a Curated Shop

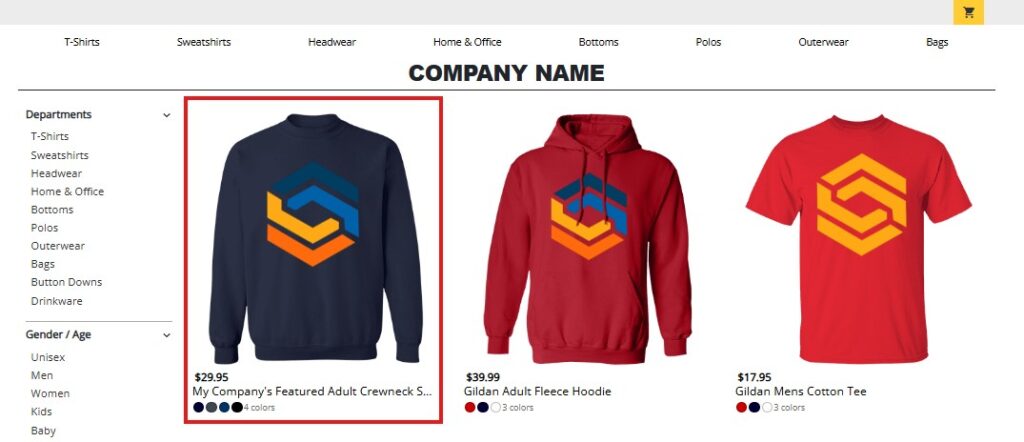
Incorporating featured products into your fully populated shops is a great way to offer special edition products, create products for particular company events, and lock a design to a specific product and  print location. 

We know you may have some clients who are very particular, so while some of  the power of this platform lies in instant shop creation, we also accommodate manual shop creation. Using featured products, you can build shops with only Featured Products to have maximum control over the product mix.

Creating a Curated Shop

In order to create a manually curated shop, begin by avoiding selecting shop colors during the shop creation process. If you have already created your shop, you can click Settings in the left navigation menu and remove your previously selected shop colors.
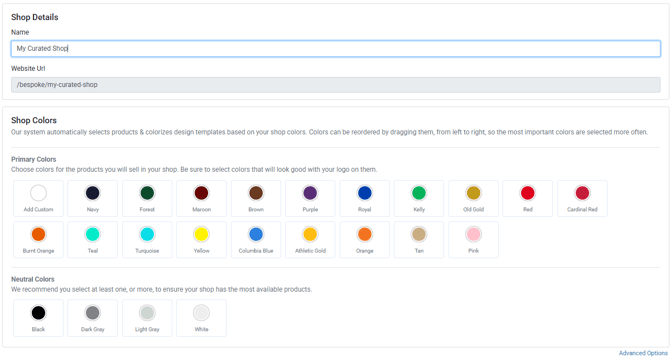
image-png-4

This will leave you with 0 included products in your Product manager, so your product manager will default to showing you Excluded Products.
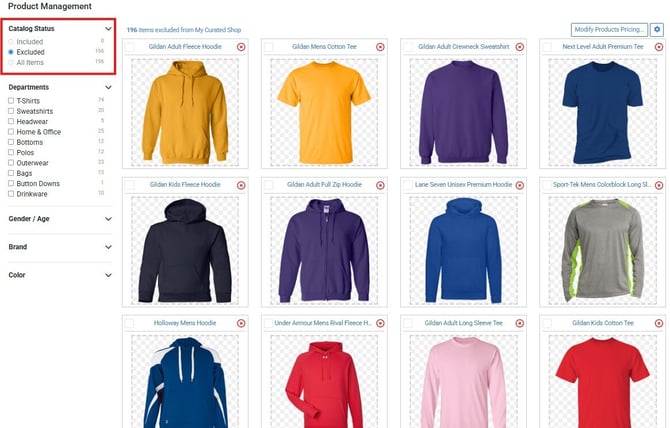
Excluded Products

From here, you have the ability to manually include products in your catalog in multiple ways.

  1. Create Featured Products to fill your shop,
  2. Include each product manually, then continue on with logo uploading to automatically apply your logo to each of your included products,
  3. OR include entire categories of products using the catalog filters on the left, then continue on with logo uploading to automatically apply your logo to each of your included products.

Featured products are manually and individually created products you can use to combine specific products, colors, and designs. These products can be utilized if you want to highlight a specific design, product, and color combination for your shop’s customers.

For a detailed tutorial on the Featured Product creation process, please review this article for step-by-step instructions.

As you create featured products, you shop will be filled. When you’re finished and ready to launch your shop, click Settings in the left navigation menu to activate!

Including Individual Products Manually

To add an individual product to your curated shop, start by clicking the product in question to view the product details. 
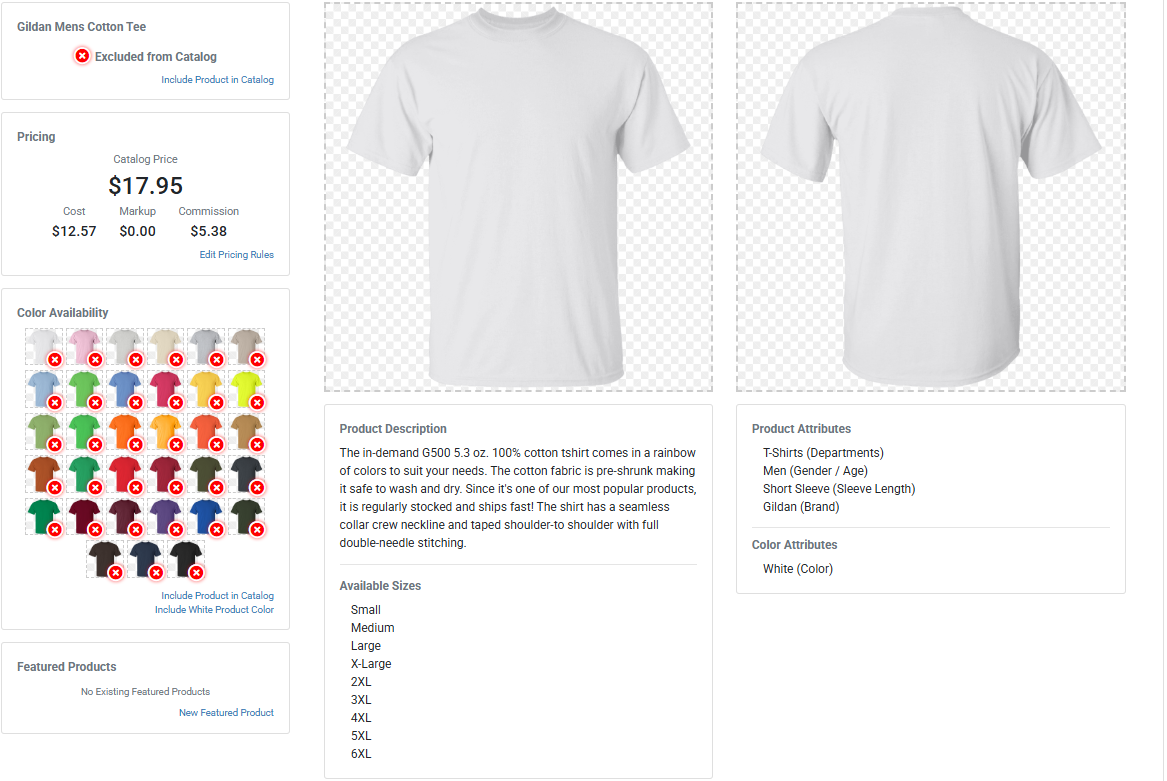
Next, select the product variant you’d like to include, and include them in the product listing. Lastly, include the product in the product catalog by clicking Include Product in Catalog either in the top left corner of the screen or above the Include Product Color link.
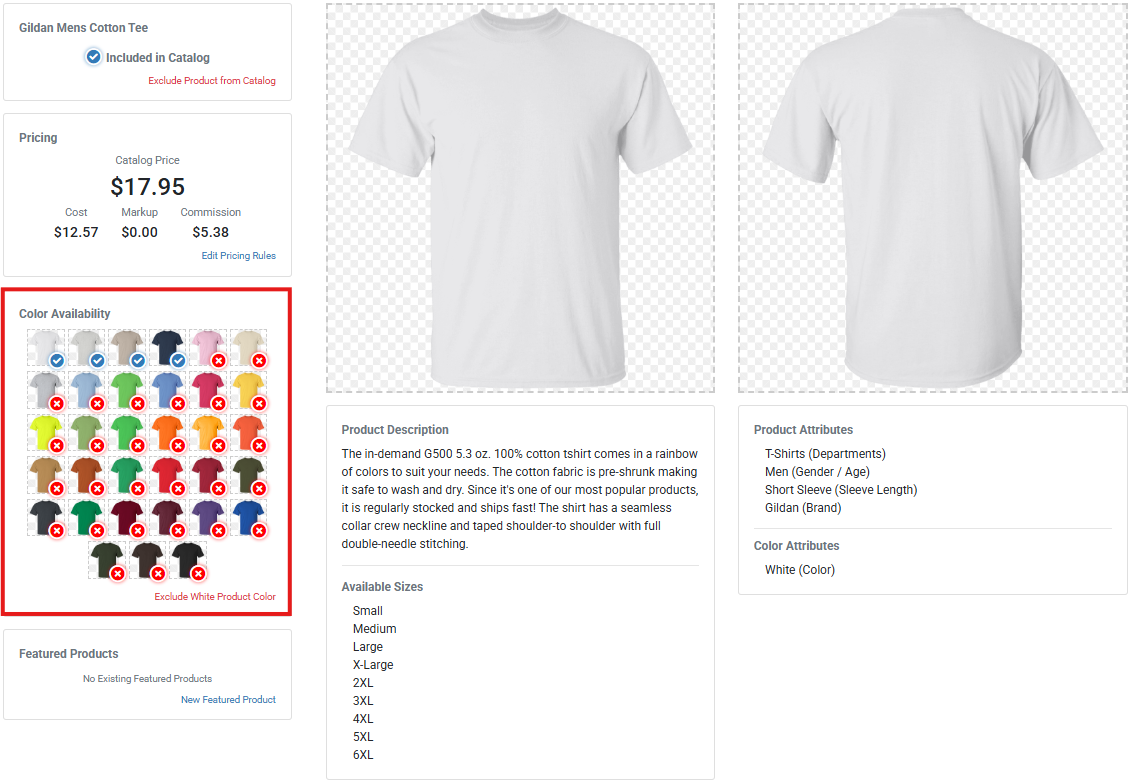
That’s it! This product has now been included in your shop with your selected colors available as variants. 

Once you’re finished including products, you can return to the shop creation wizard by clicking Home in the left navigation menu.
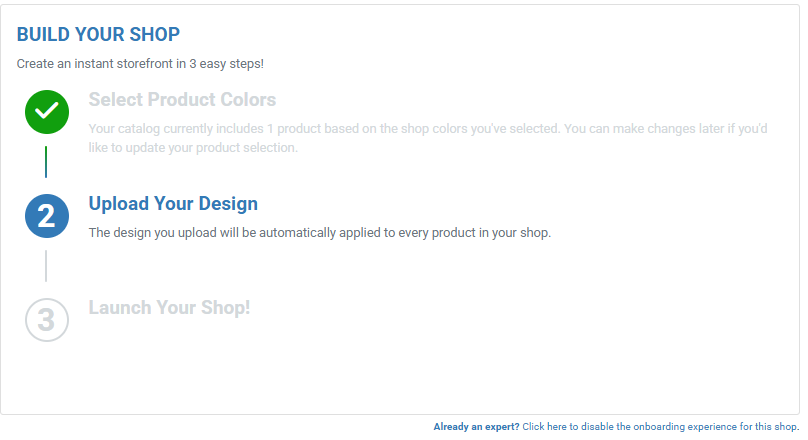
The last steps after including your products are to upload your design and launch your shop. If you would like to review a detailed tutorial on design upload, please click here.

Including Products by Product Filters

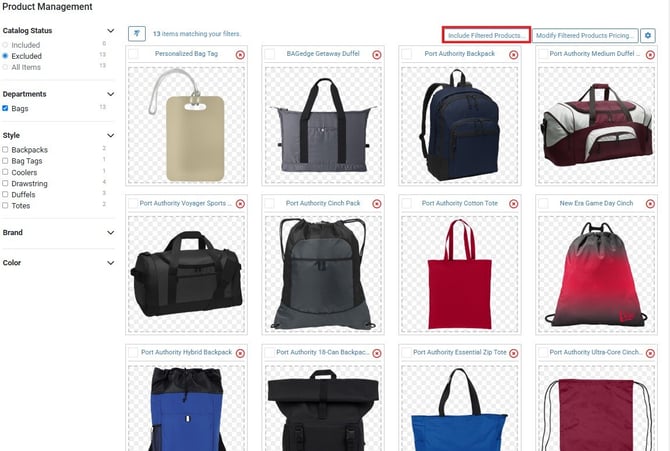
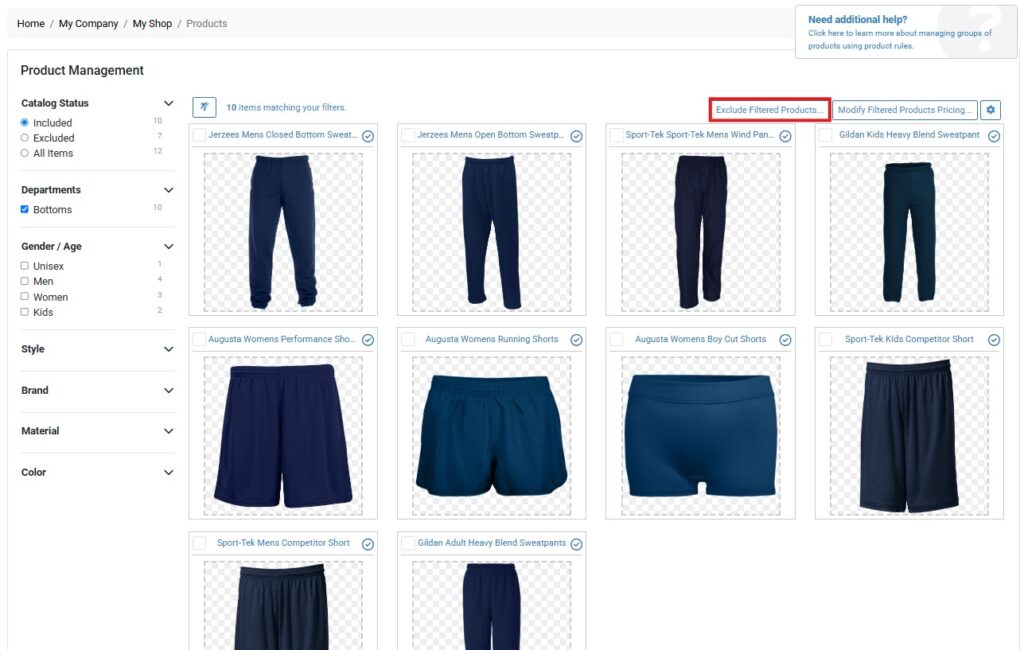
Manually curated doesn’t have to mean slow — you can also curate your catalog by including products based on attribute or characteristic using the product filters on the left side of your Product Manager. For example, if I want to include all Bags in my shop, I can click Bags from the product filters, then click Include Filtered Products

Include Filtered Products

Repeat this process as needed until you fill your shop!

Please keep in mind that including products in this way will include all available variant colors unless you use the color filter on the left to filters to a particular color product within the attribute or characteristic you’re filtering by.

Once you’re finished including products, you can return to the shop creation wizard by clicking Home in the left navigation menu.

The last steps after including your products are to upload your design and launch your shop. If you would like to review a detailed tutorial on design upload, please click here.

How to Create a Featured Product

Your shop’s catalog is automatically created by combining your product and color selections with your designs to offer hundreds of unique products to your customers instantly. 

Featured products, on the other hand, are manually and individually created products you can use to combine specific products, colors, and designs. These featured products will populate to the top of your product catalog to help them get your customers’ attention. 

Featured products can be utilized if you want to highlight a specific design, product, and color combination for your shop’s customers.

Before you create your featured product, make sure the design you intend to use has been uploaded to your Design Library.

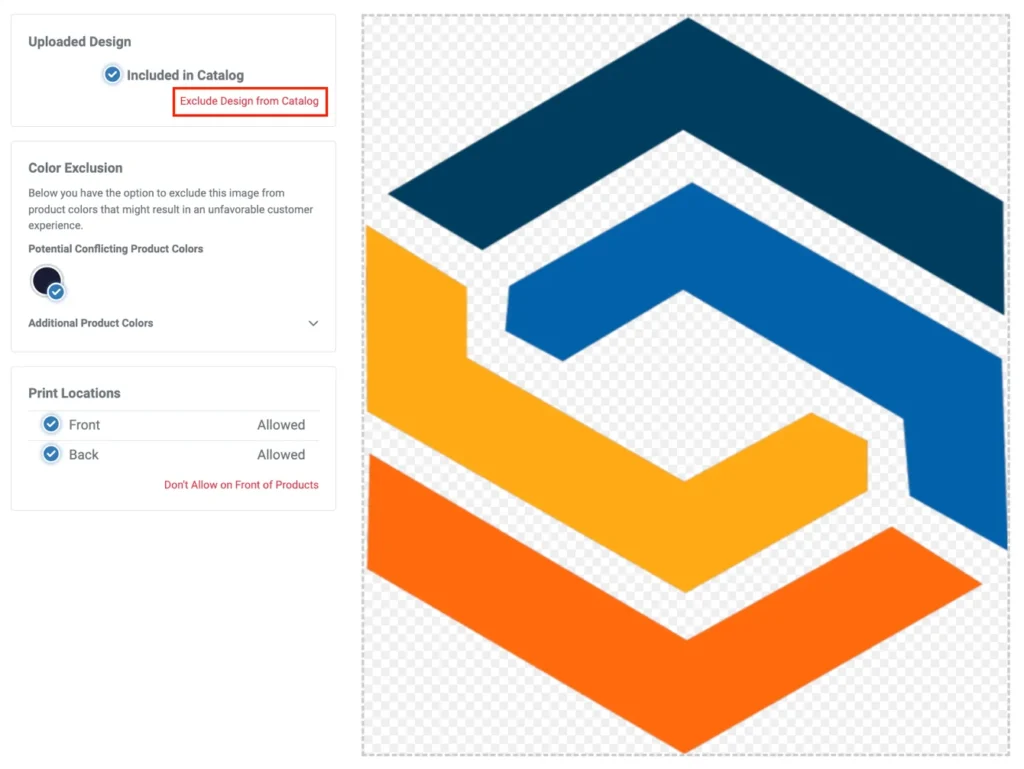
If your design will only be used on featured products, you can exclude it from your design library from within the Design Configuration page so that it isn’t available across your store on all products. It will remain available for you to select in the creation of your featured product even if it’s excluded from your design catalog. 

To enter the Design Configuration for your deisgn, simply click on it from within your Design Library. To exclude it from your shop, click Exclude Design from Catalog.

Once your design has been uploaded to your shop’s design library, click Products in the left navigation menu. Next, Click on the product you’d like to use for your featured product.

You can make your product selection from any included or excluded product

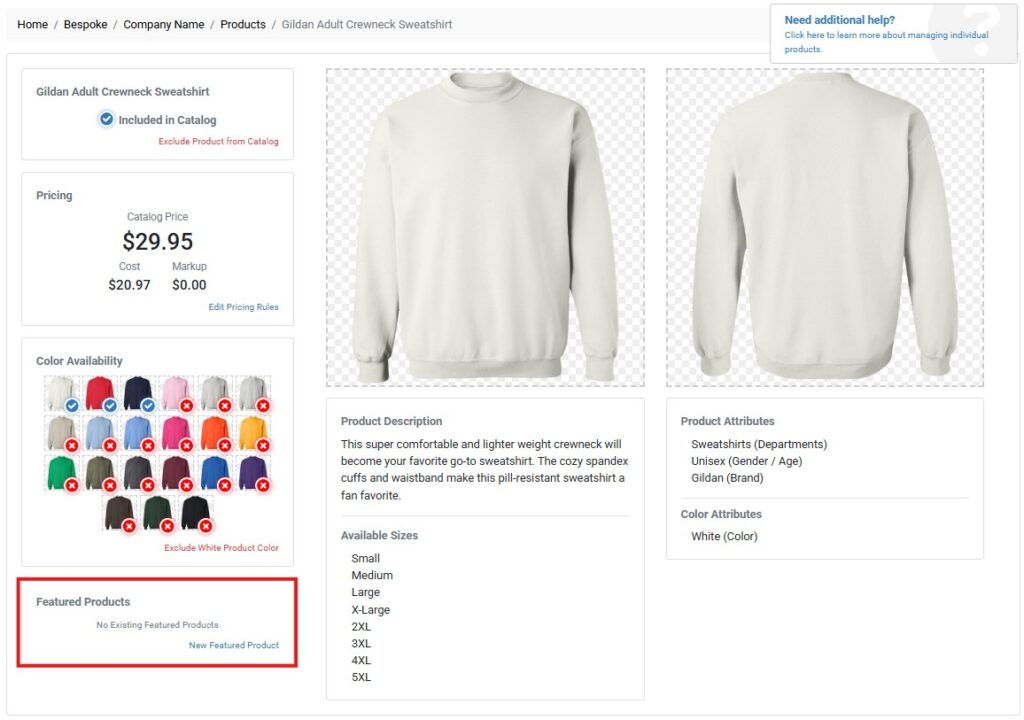
At the bottom of the product details menu, click New Featured Product

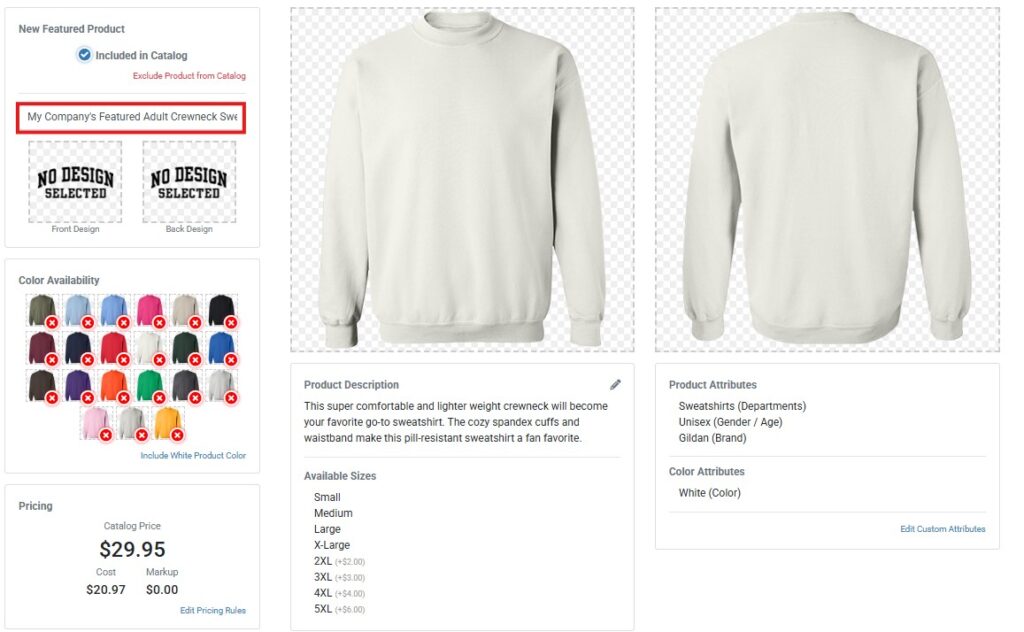
If you’d like, you can update the name of your featured product. This name will display on your website for your customers both in your product catalog and on the product page.

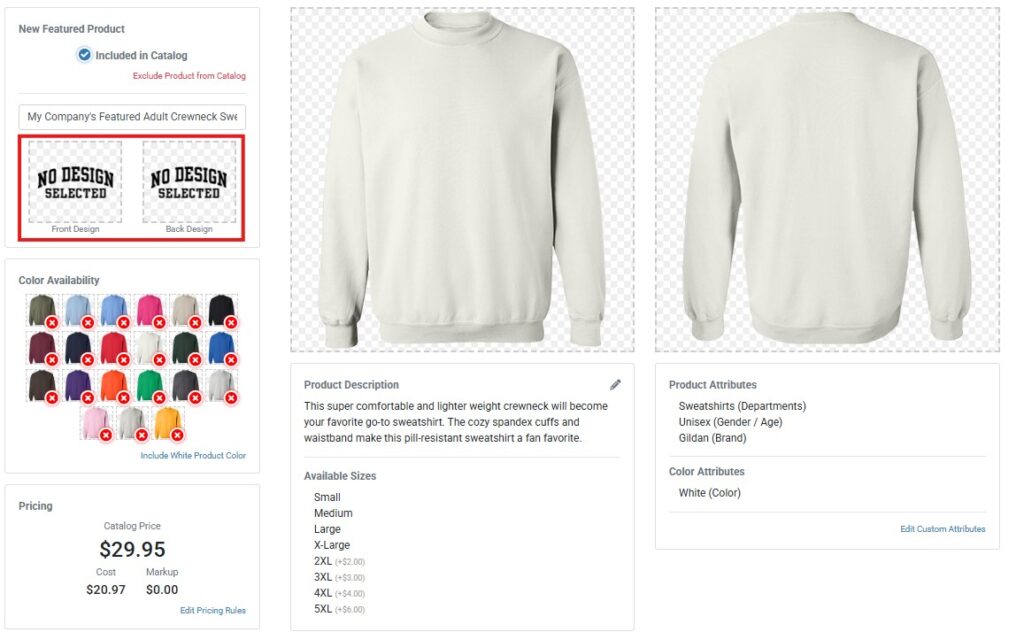
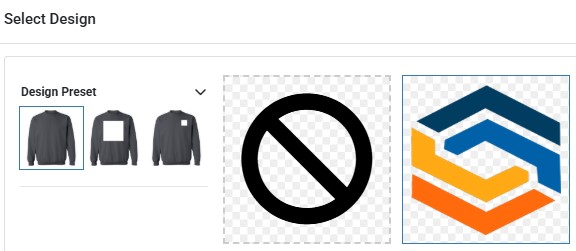
Click Front or Back design (based on where you’d like your design placed) to select a design from your Library. You can also add a design to multiple locations.

Once your design is highlighted, you can choose a print location for that design. For example, if you’re adding a front design, you will select either Full Front or Left Chest placement for your design. You can also give your customers the freedom to choose between either preset by selecting the User-Selected positioning option.

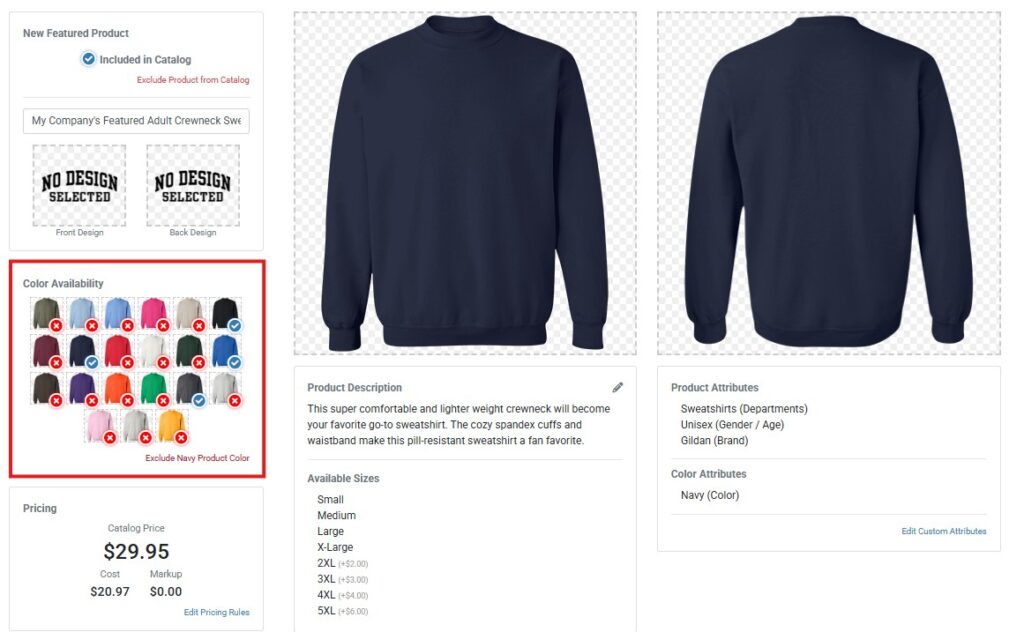
Next, select a garment color to preview your design on that color. If you’d like to include that color for your customers, click Include Product Color. Colors you’ve included will update to include a blue check mark to confirm they’ve been included.

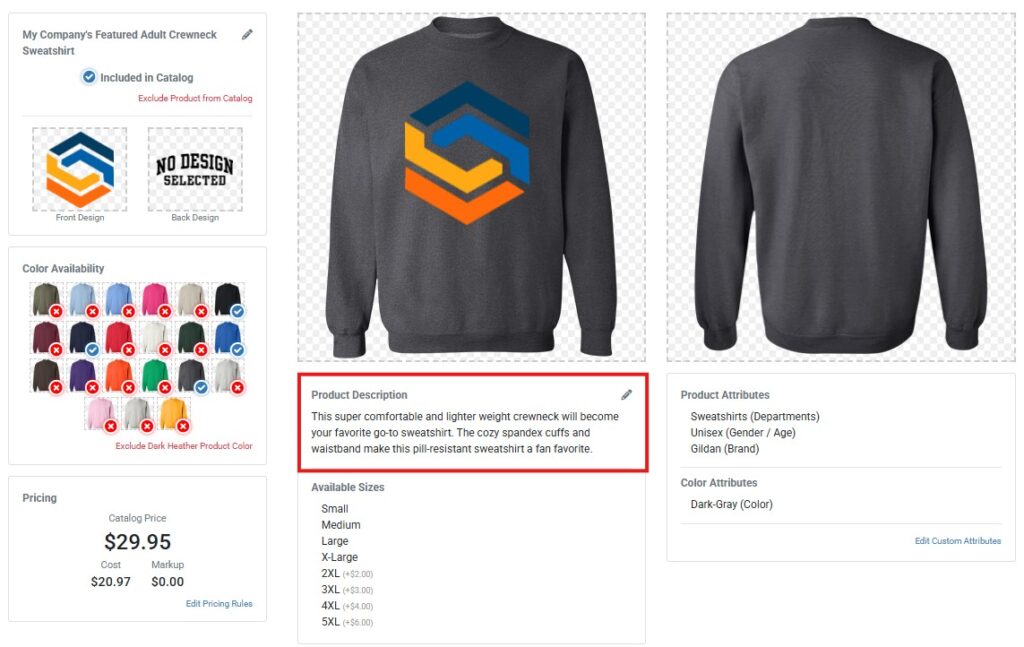
If you’d like to modify the product description, click the Edit button above the default description.

Save Changes to add your Featured Product to your shop.


Adding Markup:

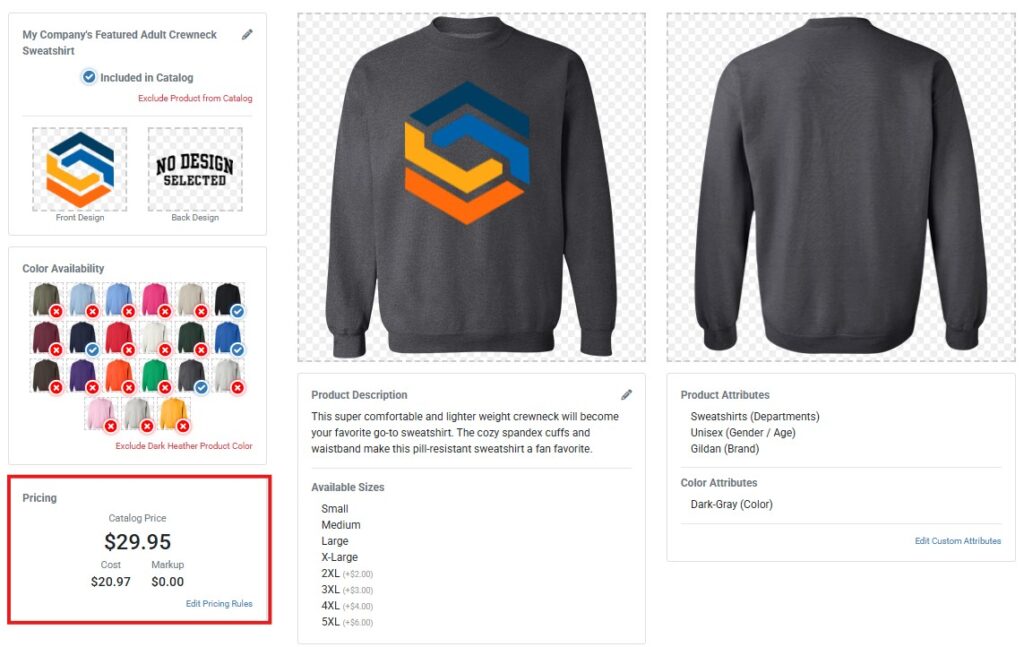
If you’d like to add markup to this featured product in addition to your base commission and any markup that you’ve already added to your product catalog, you can do so now that your product has been created by clicking “Edit Pricing Rules.”

For more detailed information about product markups, please review our step-by-step tutorial here.


Featured Product Location:

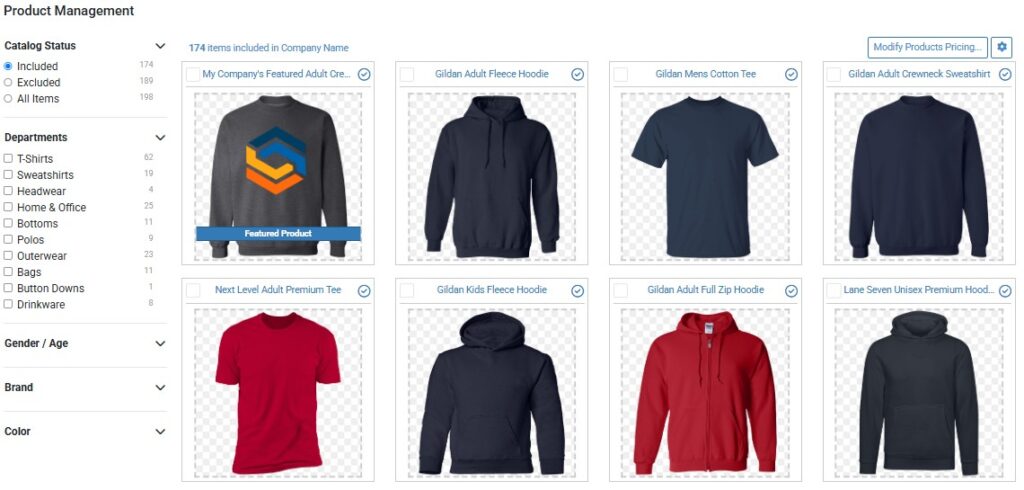
When you return to the Product Manager, you’ll see your Featured Product at the top of the Product Catalog flagged with a Featured Product Banner.

If you launch your shop, you’ll see your Featured Product highlighted in your shop’s New Products section, just as your customer will see it. Featured products are displayed prominently in your shop, ahead of the automatically generated products we built for you during shop creation. 

Please note: If you have multiple featured products, they will display from first to last in the order they are created. Keep this in mind if you wish to have them display in a certain order.

How to Manage Product Pricing

The cost of the product & decoration will always be included in the purchase price your customer pays, even if you don’t modify it before launching your store. Your base markup percentage is also included. However, you can markup products to add profit to items in your catalog at any time.

You can modify the pricing of all the products in your catalog at once, modify pricing for groups of products, or modify pricing for an individual product.

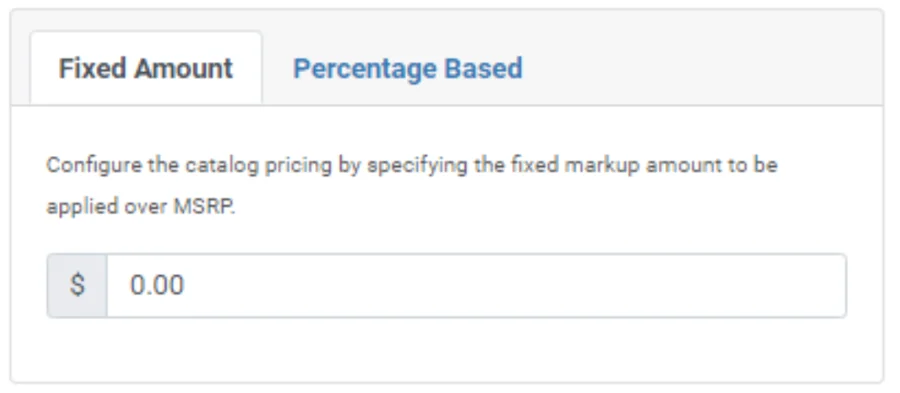
Pricing can be adjusted by percentage OR by dollar amount. For example, if you’d like to add a 10% markup to all products in your catalog to add to your profits, you can do so. However, if you prefer to structure your markups by adding $1.00 to the sale of every product, you can do that as well.

Pricing can be managed at any time by clicking My Shops, navigating to the shop in question, then selecting Products in the left navigation menu. 

Creating Markups

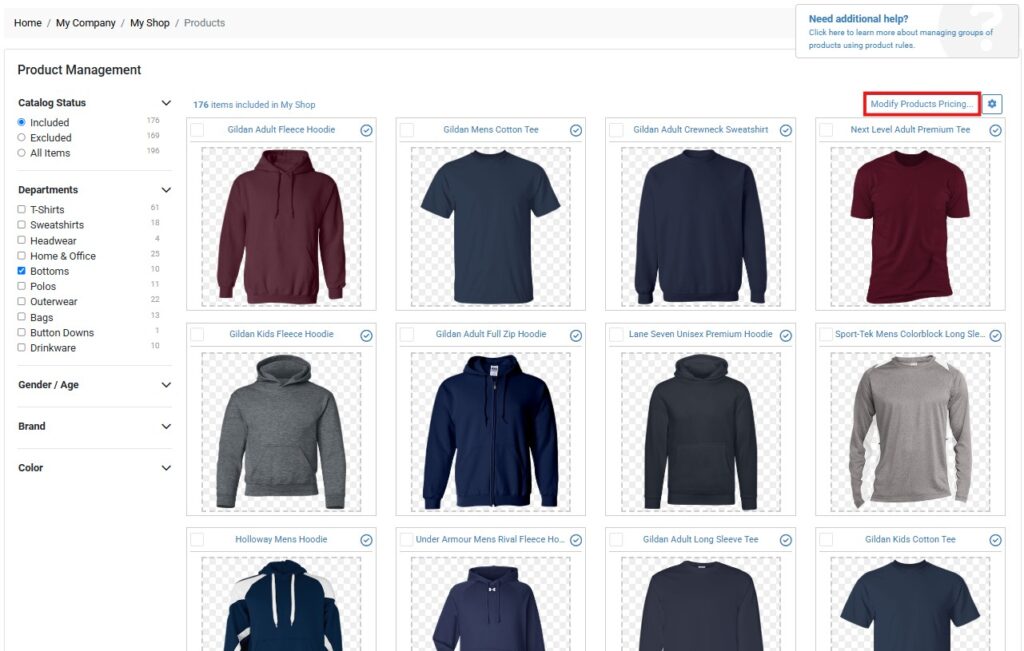
To add markups for all products in your filtered view, Click Modify Product Pricing or to create markups for selected products, click Modify Selected Product Pricing.

Next, you’ll enter the dollar amount or percentage markup you’d like to add to the products in question.

Please note that any percentage added is based on the current list price. For instance, if your base margin is 30% on a $17.95 product and you add 10% markup, an additional $1.80  will be added to the list price, bringing it to $19.75. 

After adding your markup, click Save Changes at the bottom of the page.

Your markup has been added!

Reviewing and Editing Markups:

You can review the markups you’ve created, modify them, or delete them at any time from within the Product Configuration menu at the top right of the screen.

Click the Product Configuration Icon to review your markups – we also call these pricing rules.

After a Pricing Rule has been created, you can review it or click the Edit or Delete buttons to the right of that particular rule.

Applying Price Rounding:

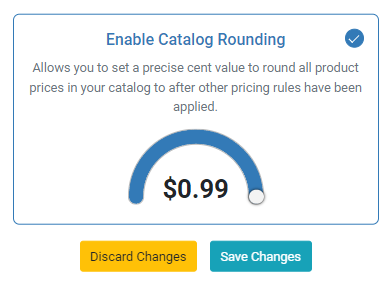
From within the Product Configuration menu, you can also apply Price Rounding to all the items in your shop. For example, if you want all products in your store to end with a $0.99 price, you can create that rule here. 

Modify the cent amount – this will ensure your product prices all end with the same number (.95, .99, etc.) when your customer is viewing products in your shop.

This will be achieved by adding markup on top of any previous markups you may have added, increasing your profits.

You can add new product or pricing rules, modify rules you’ve created, or delete any rules you’ve created from this menu at any time.

Please note that all rules are in addition to previously created rules. That means you can add markups to your entire shop and stack additional markups onto a specific product or product category.

For a step-by-step guide on sharing profits with a payable, please review our detailed tutorial on the subject here

How to Manage Your Product Catalog

Product management is streamlined so you can focus your time and energy on generating sales. We utilize a rules-based system that allows you to quickly include or exclude products based on characteristics like color, style, brand, or gender.

Your product catalog will be automatically curated for you during the shop creation process to include products with color variants that match your shop color selections.

However, if you’d like to update the selection of products offered in your shop, you can do so from within the Product Manager.

Managing Your Product Catalog:

Click Products in the left navigation menu.

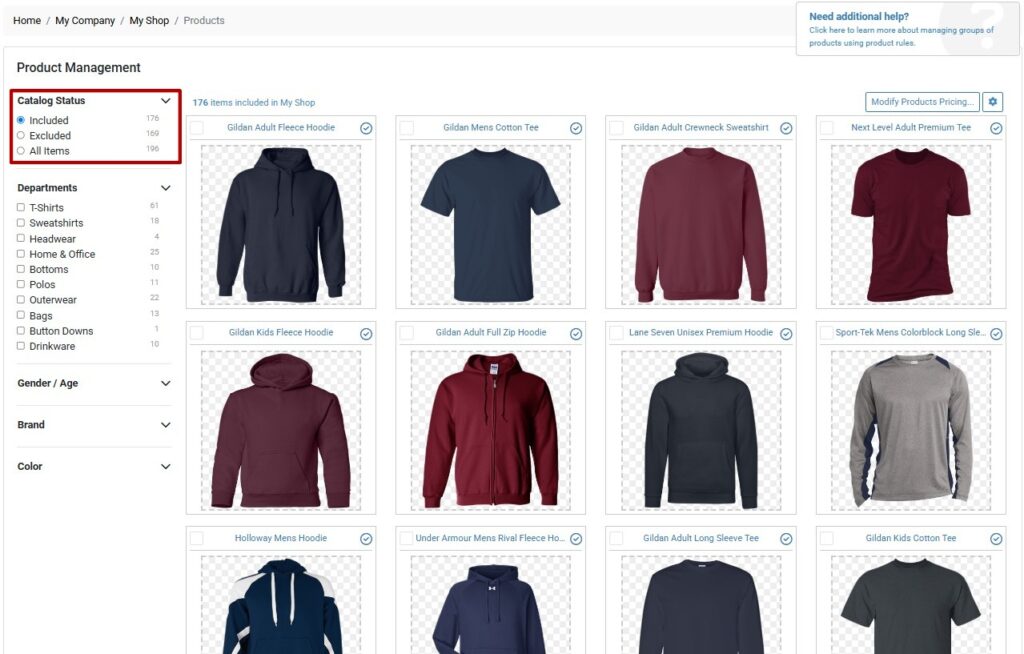
If you’ve already selected products for your shop, your view will default to all Included products.

If you haven’t made any product selections yet, you’ll be viewing all Excluded products by default.

You can quickly include or exclude groups of products on your site based on characteristics listed in the left catalog menu or select individual products to include or exclude.

If you’d like to include or exclude groups of products, you can use the product filters on the left to narrow your selection to products with specific characteristics. Once you’ve filtered your view to only the products you’d like to include or exclude, click the Include/Exclude button in the top right corner of the screen.

If you’d like to include or exclude a specific product, you can select it individually before including or excluding.

You can use these same filters to modify product pricing for all products that share a specific attribute or modify pricing for a specific garment. 

For more detailed information about modifying pricing, be sure to review our step-by-step tutorial on product pricing here.

Please note: If you are seeing blank products displayed in your storefront, it’s because you have an active Shop Color with no designs with permission to display on it. If you choose to exclude your design from any garment colors you currently have selected as your shop colors, you’ll want to be sure to either add another design to display on  those garment colors OR remove that color as a Shop Color in your settings. 

Sign Up for MOQ1

MOQ1 is for promo product dealers, decorators, and distributors only. 

Enterprise Contact Form

To learn more about our Enterprise Platform, please provide some additional information about your business. Our team will reach out to discuss next steps in 1-2 Business Days.

Claim your
$50 sample credit!

To help show you how fast and easy MOQ1 really is, we’re offering a $50 credit you can use towards a sample product. Create your account to claim yours!

Available for a limited time. Limit one per company.Â